Help › Getting StartedFor quick answers tweet @tickspot
Managing Clients In Tick
To manage clients in Tick, you’ll need to be either an Admin or the Account Owner. If you have these permissions, you’ll be able to see the “Clients” option in your navigation bar.

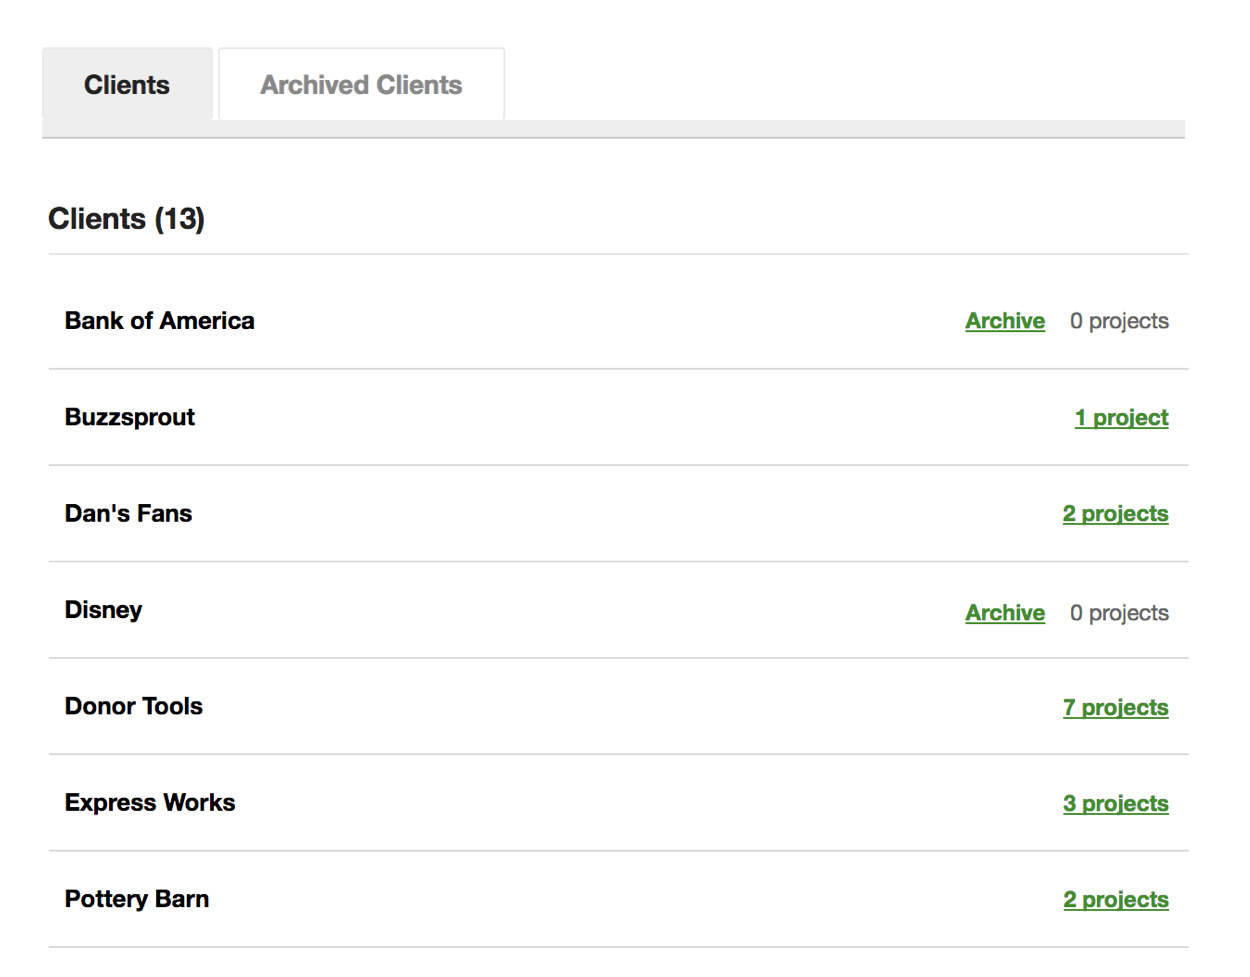
Inside, you’re able to see all your clients in alphabetical order as well as the number of projects associated with each.

You’re also able to perform 3 actions from this screen.
- Edit a client name
- Archive a client
- Delete a client
1. Editing a client’s name
To edit a client’s name, click on its name. An edit box will appear.

Give the client the desired name and hit save. This will change that client name throughout Tick’s whole database.
2. Archiving a client
If a client has no more projects, you’ll be given the option to remove it from certain menus throughout Tick with the archive feature. This keeps your project and reporting filters clean, which makes it easier to find active clients when you’re creating time entries.

Even though an archived client won’t show in certain dropdowns, all the past client data like projects and time entries is still available in the reports and archived projects sections.
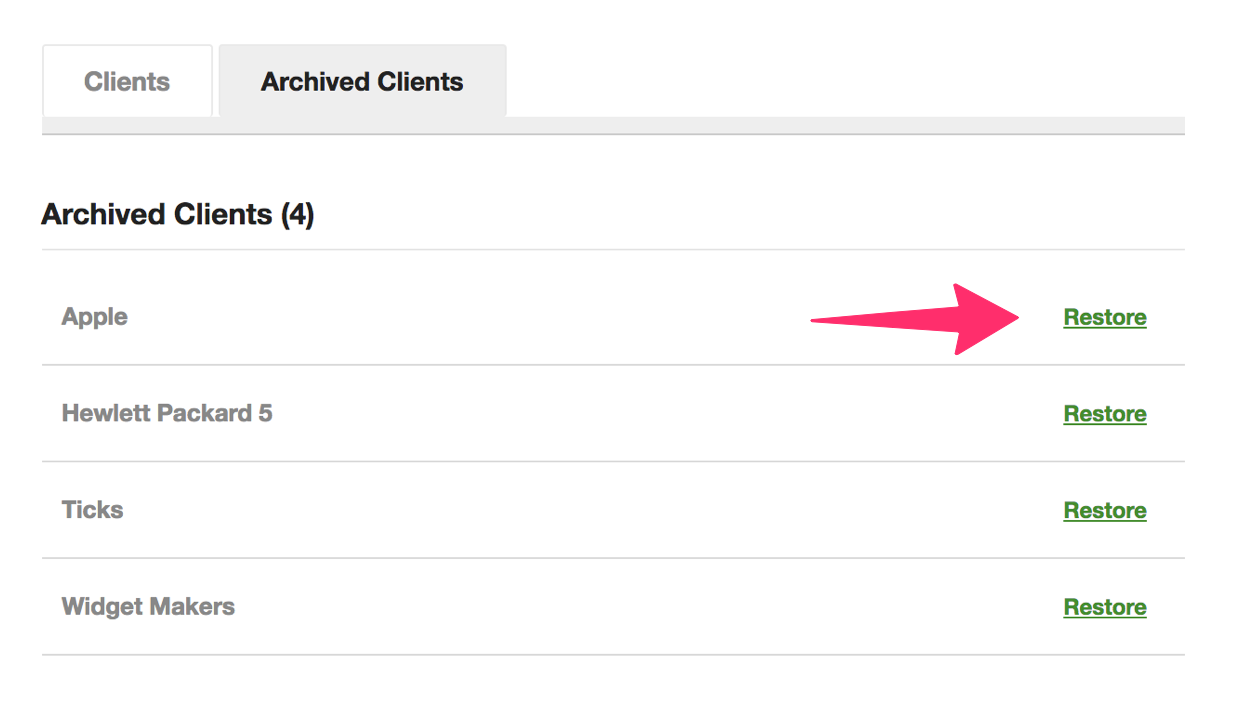
If you ever need to start a new project for an archived client in the future, simply make that client active again from the “Archived Clients” tab.

3. Deleting a Client
In the rare event where a client has no projects associated with it (including archived projects), Tick will give you the option to delete it from your client list. Unlike archiving a client, this action is permanent and cannot be undone.

If you want to be able to delete a client that still has projects, you will need to delete those projects from Tick before you’re given this option.
Admin Note: Creating a new client takes place when you create or edit an existing project. For more on how to add a new client, please see our article on Adding a Client.
- Getting Started
- Create a Project (Video)
- Add & Manage People
- Account Settings
- Managing Clients In Tick
- What are the system requirements, install procedures and update routines?
- How do I update the billing information in Tick?
- How to cancel or downgrade your Tick subscription
- Does Tick integrate with other applications?
- Import data from other time tracking products